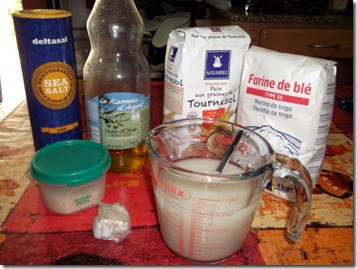
This is the recipe I’ve evolved to make my bread relatively cheaply. The ingredients are shown in the picture above and are:-
- 1Kg of specialised bread mix (used to get the type of bread I want)
- 1Kg of plain, (Type 55) flour (basic and cheap, don’t use pastry flour, Type 45 as that’s too soft)
- Tablespoon or 2 of any other grains I want to add, sesame in this case
- Olive oil
- Sea salt
- Live yeast – 2cm by 2cm by 1cm approx.
- 1 teaspoon sugar
- Water, tepid and approx. 600ml to a kilo of flour
The amounts of flour used are fixed, one kg packet of each, the amounts of the others are flexible.
I rarely measure any of the others; The yeast is sold in 42g blocks which I buy 5 or 6 at a time, cut approximately in half, and freeze using half a block at a time.
The salt is a small amount in the centre of my palm done twice, I would guess it’s about a scant teaspoon in total and the oil is I would guess between 1 and 3 tablespoons (15ml spoons) depending on how I feel. The same with the sesame seeds. The bread is slightly different every time but variety is the spice of life!
I let the frozen yeast defrost for about half an hour in the jug along with a teaspoon of sugar. Once the yeast can be creamed with the sugar I add around 400 ml of the tepid water, mix and then leave for another half hour or until small bubbles can be seen when it is stirred showing that the yeast is working.
Lately after abusing my wrists while working on the farm I’ve started to suffer with Carpel Tunnel so I now rely on my trusty Kenwood Chef to do the first mixing. I throw in around half of each packet of flour, half the yeast mixture and half the total amount of the other ingredients. I then set the Chef to work at the slowest speed to get it combined adding a bit more liquid if necessary to get a soft dough mix.
I then take that ball of dough out and do the same with the second half. When that is combined I mix in the first portion until it is all combined. I do it this way to stop flour being distributed throughout the kitchen as I found happened if I put the 2kg of flour in all at once. I then check the consistency either adding a bit more warm water if it is too dry or a bit more plain flour if it is too wet.
How much water is used depends on just how much each batch of flour absorbs and can change each time. Getting the consistency right was a matter of trial and error. The error for many of my first batches was making the dough too dry, more like a pastry consistency. This resulted in bread that was more akin to a brick than a delicacy. I also had a few batches where I added too much water so got a ball of dough swimming around in a sea of flour glue which took forever to clean up from the work surface but eventually I got something that worked!
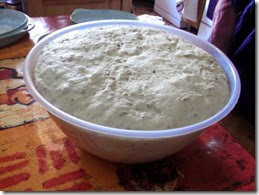
At this point I dump the whole batch on the table and kneed it a bit more until it is nicely stretchy and springy – very therapeutic. It’s than put in a large bowl, brushed with a little water to help stop the surface drying out, covered and left to double in size. If it’s not a very warm day, I pop it into the car which acts as a small greenhouse and creates a lovely warm temperature.
At this point it’s already smelling warm and yeasty. I then turn it out and knock it back with a short kneed and divide it read for the second proving.
If I have time I divide it into 100g portions and have discovered that the silicon fairy cake moulds are ideal to cook the buns in.
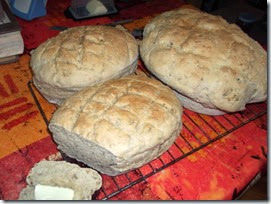
If time is short, as it was with the above batch, I’ve found the cast iron and enamelled ware I inherited from my mother, which can just be seen above the bowl work better than any loaf tin I’ve used before. I just oil them and dust with plain flour.
 The dough is then left to prove for a second time – around half and hour usually suffices this time and then they are baked at around 190C for 25mins. Again this is only approximate as it depends on your oven, the water content of the dough, the size and shape of the loaves you are making etc. etc. The bread is deemed cooked when it sounds hollow when knocked on the bottom. If is still sounds a bit dull then return it to the oven but upside down this time and cook for 5 mins longer then test again.
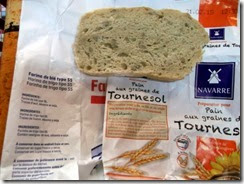
The picture below shows the general consistency of the bread – this batch was a little undercooked as I was working on other things at the time and hauled it out as soon as it was just OK. I’d also used the whey left over from making paneer as the liquid in this batch trying to minimise wastage. The picture also shows the ingredients list for the flours which hopefully is relatively innocuous for processed food  .
.

